Introduction
StitchKit Embroidery Studio is a modern studio app for designing embroidery patterns from scratch and turning ready-made images into machine-stitchable embroidery (digitizing). It converts text, monograms, artwork, and photos into stitches, then exports your design in standard embroidery machine file formats or sends it straight to the machine.
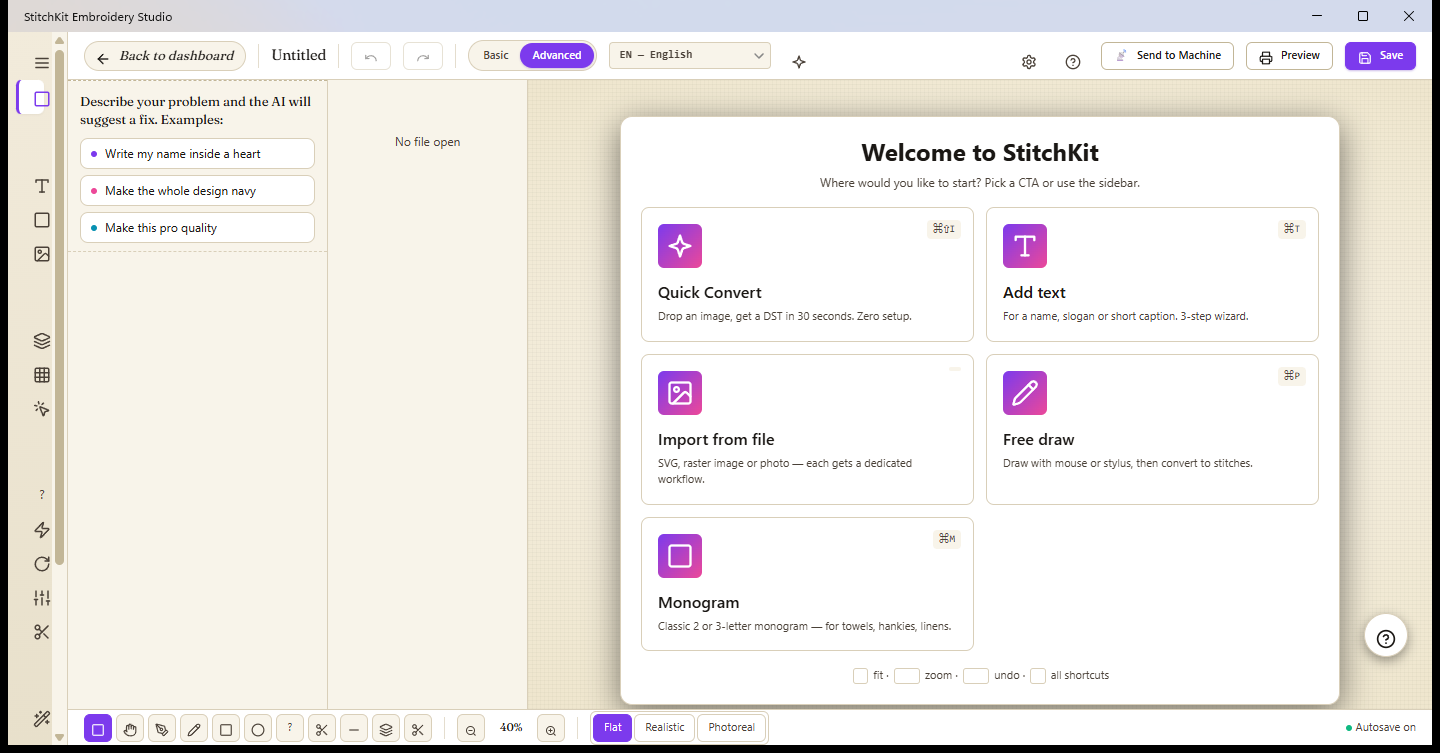
The editor welcome screen: choose where to start a new design.
What is StitchKit?
- Design and digitizing in one place — Both building a pattern from scratch (text, shapes, artwork, monograms) and auto-generating embroidery from an image ("Convert Image", "Photo → Embroidery") live in the same editor.
- Cross-platform — Built with .NET MAUI Blazor Hybrid; it runs with the same interface on the desktop (Windows, macOS) and on tablets.
- Two working modes — Use the mode switcher in the top toolbar to toggle between "Basic" and "Advanced". Basic mode gives you a clean, pared-down surface; Advanced mode unlocks all the professional tools.
- Real machine formats — It opens and saves common formats like DST, PES, JEF, VP3, EXP, and XXX (with additional formats such as HUS, VIP, U01, SHV, SEW, and PEC supported as well).
Who is it for?
- Hobbyists — For anyone running a home embroidery machine: quick workflows like names, slogans, monograms, ready-made templates, and photo-to-embroidery.
- Businesses / B2B — For commercial production shops: production tools such as batch export ("Batch Export"), customer approval-form PDFs, production work orders with barcodes, color films, and name-drop personalization.
Tablet — The full editor runs on tablets too; you can free-draw with your finger or a stylus and edit patterns. On narrow screens, the AI assistant appears as a bubble pinned to the canvas.
Quick start in 5 steps
- Open a new design. On the "Dashboard", click the "New Design" button, or pick the "Blank Canvas" card on the welcome screen and choose a hoop. If you'd rather start from an existing file, use "Open File" to open an existing .dst/.pes/.jef file.
- Add text or an image. Use one of the cards on the blank canvas: add a name or slogan with "Add text", bring in an SVG or image with "Import from file", draw by hand with "Free draw", or create a classic monogram with "Monogram". For auto-digitizing, use "Quick Convert" or the photo-to-embroidery wizard.
- Edit. Select an object on the canvas and set its size, position, rotation, and mirroring from the "Properties" panel on the right; change colors and stitch order from the "Layers" list in the left panel. When needed, apply settings such as density, underlay, and fill type.
- Preview. Open the print/approval output with "Preview" in the top toolbar. For a realistic look, turn on "Realistic preview" mode with the sparkles icon in the top toolbar, and play back the design's stitch order using the timeline at the bottom.
- Save / Send. Use "Save" in the top toolbar to save the design to your library, or export it in the machine format of your choice. If your machine is connected, send the design straight to it with "Send to Machine".
Tip — Designs you save are automatically added to your "Library"; you can quickly reopen them later from the recent files on the welcome screen or from the library.
Note — Saving, exporting, and sending to a machine may depend on your plan for some features; on the Free plan, these steps may route you to the "Upgrade" screen.
A quick glossary of embroidery terms
| Stitch | The smallest unit of embroidery: the thread line running from one point where the needle enters and exits the fabric to the next. A single design is made up of thousands of stitches. |
|---|---|
| Jump | A dead move where the needle "jumps" between two points without stitching. It's used to travel to a distant area without breaking the thread, and is usually trimmed afterward. |
| Trim | A thread-cut command. It tells the machine to cut the thread before moving on to the next area, preventing loose threads from stretching between separate regions. |
| Hoop | The frame that holds the fabric taut. The hoop size sets the maximum stitchable area a design can fit into; in StitchKit you can select and display a hoop frame on the canvas. |
| Tatami | A fill type made of parallel rows of stitches that cover large areas. It gives big surfaces a flat, durable texture. |
| Satin | A fill/border type made of side-by-side, glossy, long stitches. It's ideal for lettering, thin bands, and sharp edges, and leaves a shiny surface. |
| Underlay | Preparatory stitches laid down before the main fill. It anchors the fabric, holds the design in place, and helps the top stitches sit more evenly. |
| Density | How closely the stitches are packed together (the number of stitches per unit of distance). High density gives a fuller but thicker, stiffer result; low density is lighter. |
| Digitize | The process of converting an image or artwork into the stitch commands a machine can sew. StitchKit automates this with the "Convert Image", "Photo → Embroidery", and "Quick Convert" workflows. |
| DST / PES | Common embroidery machine file formats. DST is the industrial standard and usually carries no color information; PES, by contrast, includes color and extra data and is a widespread format on home machines. StitchKit also supports JEF, VP3, EXP, XXX, and more. |